If I remember rightly we stopped last time with the engine installed but not much tightened up. Jacking up the near side to the unfeasible height of Fred‘s stands allowed more than enough room to do the job. First I adjusted the height of the rear end of the gearbox to place the cross bar centrally in the snub rubber located in the tail of the box. Well that‘s how Barry said to do it. This apparently sets the engine at the correct angle and the mounting bolts and tie bar can be tightened. Access to the engine mounting bolts was easy. This worries me since I remember writing about how hard it was on dismantling. Either I‘m getting better or I‘ve missed something. (and you won‘t get many votes for the former around here!)
And so to the wire. You may have the impression that I‘ve been putting this off and you would be right. Coiled up in a box the wiring loom looks even more intimidating than spread out. Solution? Spread it out and have a look.
So far so good. Not much one can get wrong so far. On close examination it was clear that the fuse box, which in my wisdom I had left all joined up, was closer to one side than the other. Since the fuse box is on the left we have the beginnings of orientation. Furthermore, each end of the highly intimidating central part has a long wrapped section which clearly are the under bonnet bits. This required little in the way of detection since I had left the grommets on where they pass through the bulkhead. Firstly therefore I shoved each extension through its appropriate bulkhead hole and laid it along its respective wing. This of necessity positions the central loom along the inside of the bulkhead. There is even a huge landmark where several very large wires meet in some sort of junction which denotes the very centre and screws to the bulkhead through its bakelite backing structure. The first lug broke off when I tried to install it because I didn‘t get it firmly positioned before tightening the screw. However, I bravely pressed on, on the assumption that one locating screw is as good as two. Then I broke the other. Well it probably doesn‘t need to be screwed down anyway. On with the job.
I manoeuvred the fuse box into position and utilising the lesson just learned fixed it in place without further mishap. This simplifies the job considerably, since the position of all the other bits are at least roughly fixed if you have the centre, one end and both forward extensions in place. Even I can work out that the number of possible destinations for any wire is limited by what it can now reach. Even better, the right hand end is festooned with plugs which must have mates somewhere. Diligent exploration revealed that all these plugs are different so each has only one possible mate. Most of the in situ plugs were under the dash around the steering column and as that bit seemed to want to bend that way they were readily joined up. Some went on the wrong side of the column and prevented sundry bits working but recourse to the book revealed enough pictures to get them into place. After that it‘s just slog. Trial and mostly error. Helped by the wiring diagram in the book and matching colours most joints can be correctly made. Given that joints can only be made where wires will reach and that most times the two wires are the same colour then one soon reaches the point at which only one set remain within reach of each other. Assuming all foregoing connections were right then as Sherlock Holmes said ”When you have eliminated the impossible then whatever remains, however improbable, must be the truth." Actually there‘s a flaw in that dictum as we shall see. That which you eliminate may not actually be impossible.
The left under bonnet loom has relatively few branches and therefore can be largely fitted on the ”put it where it reaches" principle. I had some trouble with the alternator and starter leads since they come off right at the front and double back past the sump. However, I felt sure all was well. Likewise the right half started well. The heater wires come first, are the right colour and won‘t reach anything else. The same applies to the wiper motor, brake reservoir, coil and distributor which only leaves the three long wires sheathed together which seem to want to go to the front.
Now I don‘t know if my car was a Friday afternoon job or if the factory ran out of some colours but mine doesn‘t always match the book for colour. At one stage I was sure I‘d found the pick up for the towing plug just behind the headlights and various of the right side seemed wrong. Still Sherlock knows best. Press on. These three wires were giving me a hard time so I asked at the Thursday night meeting. The eventual conclusion was that they were for the ballast resistor, whatever that is. Go forth and buy a ballast resisted coil and resistor they said. So I did. Problem is I don‘t remember taking off anything like the gizmo I bought. Nor could I find a hole where it might fit. I did a sweep of the whole range of the extension but no luck. Never mind I‘ll drill one.
A week later I found the missing washer bottle and clipped it into place. I took up the correct wires to fit, or would have done had there been any. There were none. Now as the bottle has a little motor to pump water there must be wires. Back to the book. Heater, Wipers, wiper relay and brake reservoir were all in the correct colour. Having attached a battery (without a fire) I switched switches and proved the connections by meter until I came to the coil, the connections to which mysteriously came live when I switched on the washer. Sadly the wires also reached the washer bottle rather nicely. So what on earth goes to the coil. Back to Sherlock. There‘s only one set of wires left and they‘re the right colour and they reach. Anyone need a ballast resisted coil??
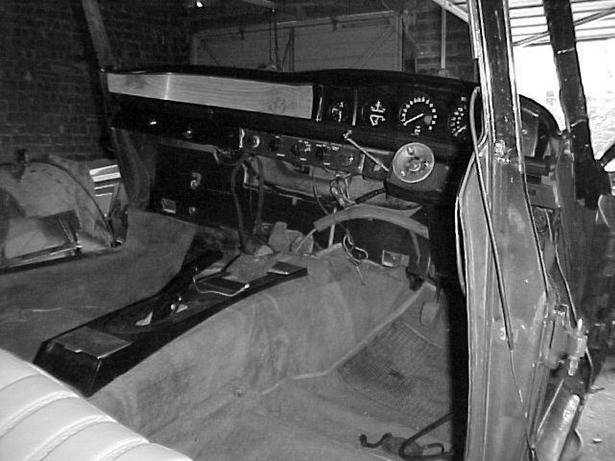
The rest was relatively easy since only one or two wires remained to reach any connection and colour coding took care of which was which. The starter won‘t turn the engine yet but that is nothing new to one who grew up on Fords. There are still many connections to be made to the lights but that‘s for the future when the panels come back. All the knobs now produce electricity in the appropriate places and the interior lights work (hence the warm interior glow. You thought I‘d set it on fire didn‘t you?).
In retrospect the biggest mistake I made was in cutting the ties which held the loom. Had I taken the time to undo them I could have fixed the loom exactly rather than lay it approximately. This would have cut down the apparent options on replacing and speeded the task enormously.
And so to other jobs. The handbrake boot went on. Not without difficulty but at least without dropping the prop shaft again. The handbrake cable was attached to the floor bracket and adjusted so I now have some means of stopping the car. (If only he had some way of making it go. Ed). I found the exhaust bits which were removed nearly two years ago and did a trial fit. Of course they bear little resemblance to the diagram in the book. Rover had several layouts apparently, none of which look like mine. Of course some different after market bits might have been used in it‘s previous life. Fortunately one of the many catalogues in my pile had pictures of all the sections ever used and the sequences in which they saw service and there was my system. Made of standard bits but, like Eric Morcambe‘s musical notes, not necessarily in the right order. Still it fits the brackets and presumably worked so I‘ve ordered the relevant bits.
Yesterday being a nice Sunday I sat outside the garage cutting up a roll of underlay which I bought at the Great York Autojumble (note the plug Barry). Once fitted to the bare interior I could trial fit the carpets which looked so bedraggled out of the car. When fitted however, there is so much hidden by trim and floor mat that they don‘t actually look so bad. Unless I find a nice roll end in the near future they will have to do for now.
I tried to enter for Sledmere hoping to slide quietly into a row of P6s but Paul put paid to that by declaring it too new. Funny I never had trouble with the Stag. Instead he insists that the car should have a prominent spot to itself by the marquee with the story displayed. So if you want to see what all the fuss is about come to Sledmere on the last Sunday of June. I‘ll be the one hiding in the bushes. (Or beer tent. Ed). We should be ready. (What‘s this we? Ed.) There‘s only the roof to vinyl, throttle linkages, choke and lights to fettle. Oh and the doors to refit with winding gear and the screens to fit and the reveals to paint and all the rubber seals to fit and - Oh heck!